Creating GUI based Url-shortner
Hello Coders!!
In this blog I'll show you how can you make a GUI based url shortner using tkinter and bitly_api packages.
Url-shortner is a technique to shorten the length of the Url For example:- example.com/site/site1 can be shorten as example.com/s1. Url shortner are used because in many of the messaging applications such as twitter developers set the limit of character, their url-shortner become very useful to share your links.
In this blog article we will see :-
1. Introduction to Url
2. How to use bitly api to shorten url in python-tkinter
3. Deep dive into code
Let's get started:-
Introduction to Url
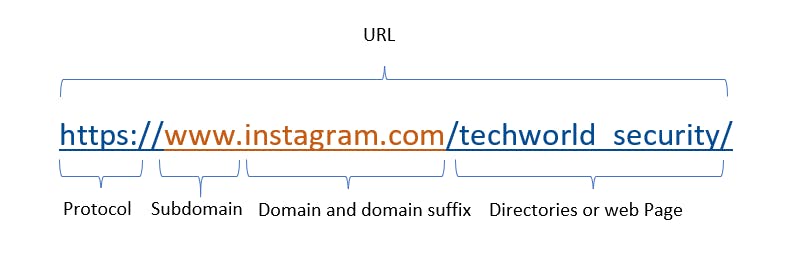
A Uniform Resource Locator (URL), also known as a internet address or web address, a is a form of URI (Uniform Resource Identifier ) and standardized naming convention for addressing documents accessible over the Internet and Intranet for example
URL is brekdown into = Protocol + Subdomain + Domain or domain suffix + Directories or webpage.

To know more about url you can refer to page computerhope.com/jargon/u/url.htm
Use bitly api to shorten url in python-tkinter :-
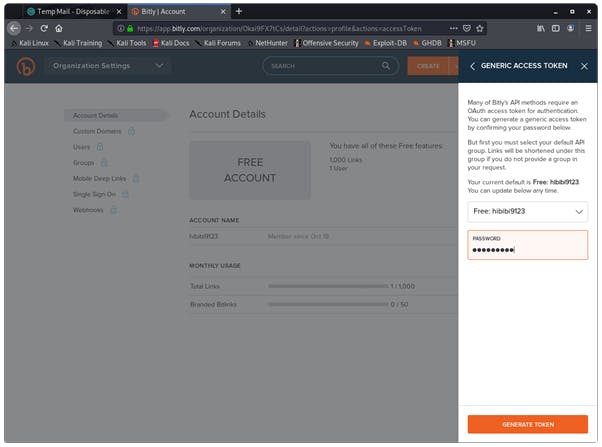
Visit Bitly.com and make a free profile, get the generic access token (which we will use in our python code) after verifying your mail id.

Installing python-tk and biltly package
To install tkinter on linux you can use following command or for windows users download Activestate
sudo apt-get install python3-tk
pip3 install bitly_api
Let's start codding
First we will import tkinter and bitly_api
from tkinter import *
import bitly_api
Then we will define a class named MyWindow: where we will specify the layout of out GUI
class MyWindow:
    def __init__(self, win):
        self.lbl1 = Label (win, text= ' Enter the url to shorten')
        self.lbl3=Label(win, text='Result')
        self.t1=Entry()
        self.t3=Entry()
        self.lbl1.place(x=10, y=50)
        self.t1.place(x=200, y=50)
        self.b1=Button(win, text='Go', command=self.short)
        self.lbl3.place(x=10, y=200)
        self.t3.place(x=200, y=200, width=180)
        self.b1.place(x=200, y=150)
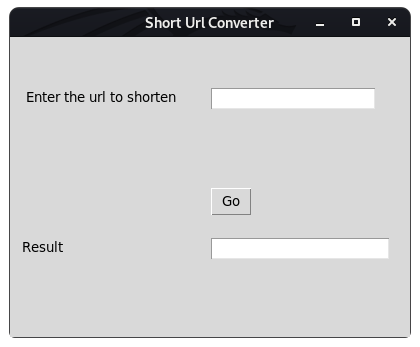
self.lbl* is used to give a label to the elements inside the tkinter window. self.t*=Entry() is used to make the input/output box where the I/O will be taken from user and result being displayed.
self.btn1 is used to specify the button properties. self.lbl1.place(x=10, y=50) is used to position the label, button,entry box. self.b1=Button(win, text='Go', command=self.short) this command tells what action go button will take, as in this code self.short short defination is called.

def short(self):
        self.t3.delete(0, 'end')
        BITLY_ACCESS_TOKEN = "<Your access token>"
        b = bitly_api.Connection(access_token = BITLY_ACCESS_TOKEN)
        response = b.shorten(self.t1.get())
        for key, value in response.items():
            if key.startswith('url'):
                f=key, value
        self.t3.insert (END, str(f))
self.t3.delete(0, 'end') deletes any previously saved output in the result section. Then enter your generic access token that you got from bitly website,then we connect to biltly with our token access key and save that output in response variable with the command b.shorten. self.t1.get() is used to get the url user entered. For loop is used to remove the unwanted excess data in the result column.
window=Tk()
mywin=MyWindow(window)
window.title('Short Url Converter')
window.geometry("400x300+10+10")
window.mainloop()
window=Tk() this tk() command is used to create a top-level window (root) having a frame with a title bar, control box with the minimize and close buttons, and a client area to hold other widgets. window.title to add the title to the window The geometry() method defines the width, height and coordinates of the top left corner. The application object then enters an event listening loop by calling the mainloop() method. The application is now constantly waiting for any event generated on the elements in it.
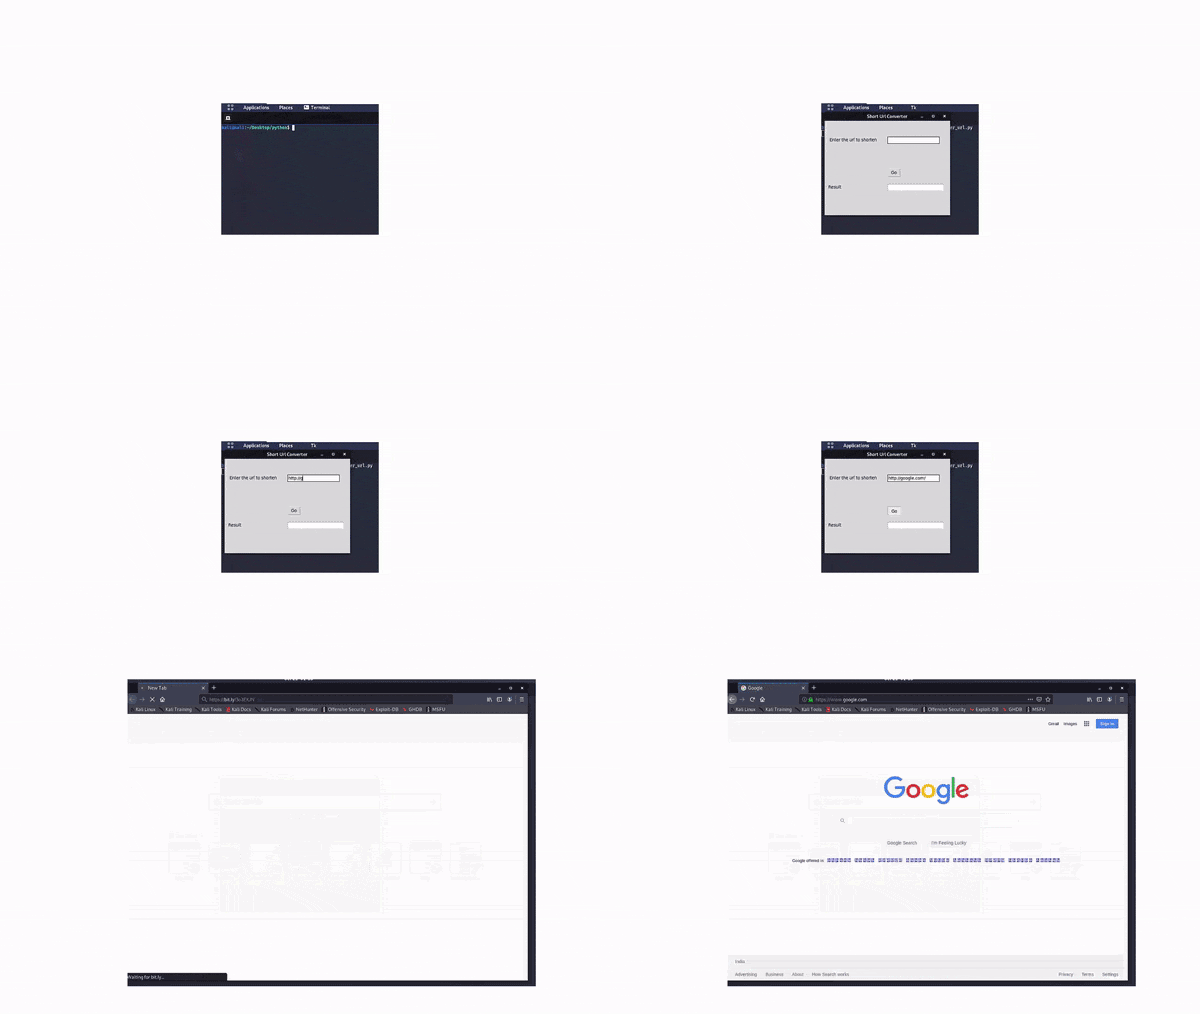
This is the snippet of our witten code

Follow me on Instagram techworld_security
Github repository for code tkinter_url.py